 Pin
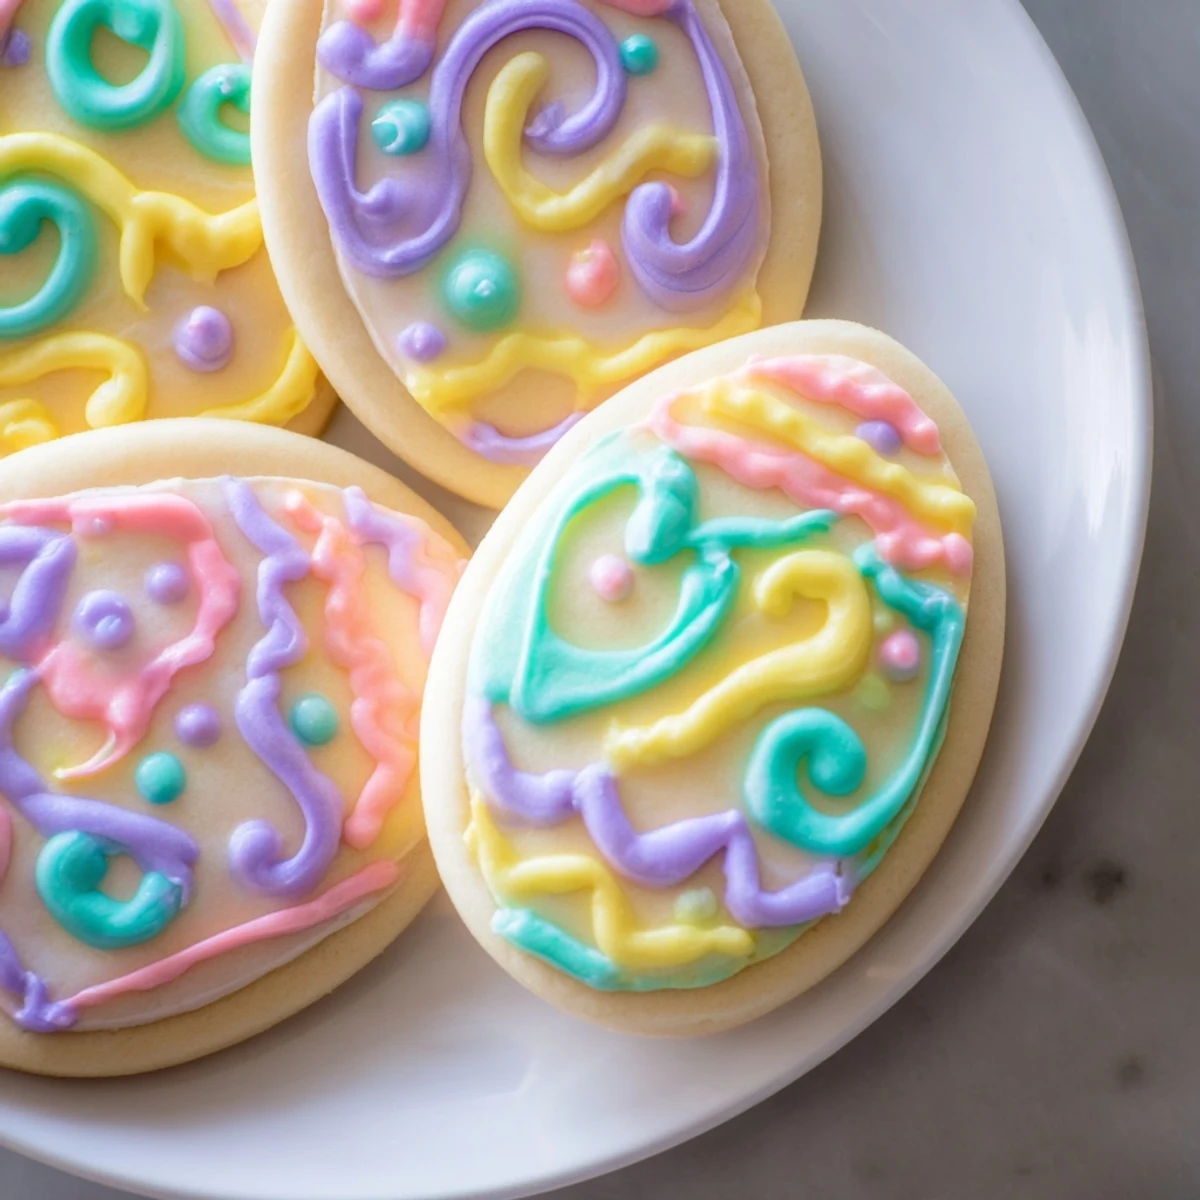
Pin These buttery sugar cookies are shaped like Easter eggs and decorated with vibrant royal icing in pastel shades. The dough is chilled before baking to achieve a tender texture. After baking, the cookies cool before being adorned with smooth, pipeable icing for a festive finish. A touch of almond extract can be added for extra flavor, and the decorated cookies can be stored in an airtight container for up to a week. Perfect for spring holiday gatherings and celebrations.
My kitchen smelled like pure butter and vanilla the first Easter I attempted these with my nieces. We had flour everywhere, pastel sprinkles scattered across the floor like confetti, and three very determined little girls wearing matching aprons. The cookies themselves came out tender and melt-in-your-mouth perfect, but what I remember most is my oldest niece carefully piping tiny polka dots and declaring them 'professional bakery quality.' Now they request them every spring, and honestly, I love having an excuse to break out the pastel food coloring and play with icing again.
Last year I made six batches for our neighborhood egg hunt, setting up a decorating station on the back porch with little bowls of different colored icing. Watching adults get just as excited about piping squiggles and dots as the kids were was absolutely the highlight of my spring. I ended up handing out recipe cards to three different neighbors because their families refused to believe these could be made at home.
Ingredients
- 2 1/2 cups all-purpose flour: The foundation of perfectly tender cookies that hold their egg shape after baking
- 1/2 teaspoon baking powder: Just enough lift for a light texture without losing that classic sugar cookie density
- 1/2 teaspoon salt: Balances the sweetness and enhances all the buttery vanilla flavors
- 3/4 cup unsalted butter softened: Room temperature butter creams into the sugar beautifully creating that melt in your mouth texture
- 1 cup granulated sugar: Sweetens the dough and helps create those delightfully crisp edges
- 1 large egg: Adds structure and richness while helping everything bind together
- 1 1/2 teaspoons pure vanilla extract: The classic warm flavor that makes these taste like home
- 1/2 teaspoon almond extract optional: A subtle enhancement that pairs so beautifully with vanilla
- 2 cups powdered sugar sifted: Creates the smoothest royal icing without any lumps
- 1 1/2 tablespoons meringue powder: The secret to royal icing that hardens perfectly for stacking
- 3 to 4 tablespoons water plus more as needed: Adjust to get your icing to perfect piping consistency
- Food coloring assorted pastel shades: Soft spring colors that make these cookies feel festive and bright
Instructions
- Whisk the dry ingredients together:
- In a medium bowl, combine the flour, baking powder, and salt, whisking until everything is evenly distributed
- Cream the butter and sugar:
- Beat the softened butter and granulated sugar in a large bowl for about 2 to 3 minutes until the mixture looks pale and fluffy
- Add the wet ingredients:
- Beat in the egg along with the vanilla extract and almond extract if you are using it, until fully combined
- Combine everything:
- Gradually add the dry ingredients to the wet ingredients, mixing only until just combined and no flour streaks remain
- Chill the dough:
- Divide the dough in half, flatten each piece into a disc, wrap in plastic wrap, and refrigerate for at least 30 minutes
- Prepare for baking:
- Preheat your oven to 350 degrees F and line baking sheets with parchment paper so the cookies do not stick
- Roll and cut:
- Roll out the dough on a lightly floured surface until it is about one quarter inch thick, then cut out egg shapes and place them one inch apart on the prepared sheets
- Bake to perfection:
- Bake for 9 to 11 minutes until the edges are just barely beginning to turn golden, then let them cool on the sheets for 5 minutes before transferring to a wire rack
- Make the royal icing:
- Whisk together the sifted powdered sugar and meringue powder, then gradually add water until the icing is smooth and pipeable
- Decorate and enjoy:
- Divide and tint the icing with pastel food coloring, then decorate the cooled cookies with festive patterns and let the icing set completely before serving or storing
 Pin
Pin What started as a one time holiday activity has somehow become one of my favorite spring traditions. There is something almost meditative about piping tiny designs while rain taps against the kitchen window, surrounded by bowls of pastel icing and the anticipation of sharing something handmade with people I love.
Making The Perfect Egg Shapes
I have learned that rotating your cookie cutter rather than pressing straight down gives the cleanest edges, especially when you are working near the edges of your rolled dough. Gather and reroll your scraps just once because the more you work the dough the tougher the cookies become. A thin metal spatula is your best friend for transferring cut shapes to the baking sheet without stretching them out of shape.
Getting Icing Consistency Right
The perfect royal icing for outlining should fall off your spoon in a thick ribbon and disappear back into the bowl within about 10 seconds. For flooding the larger areas you want it slightly thinner so it spreads smoothly to the edges but does not run over. I keep a small spray bottle of water nearby to thin the icing a drop at a time because it is surprisingly easy to add too much liquid all at once.
Decorating Like A Pro
Start by outlining each cookie with a slightly thicker icing and let it set for about 5 minutes before flooding the center with thinner icing. Work with one color at a time and keep any bowls you are not using covered with a damp paper towel because royal icing dries out incredibly fast. A toothpick is perfect for guiding the icing into corners and popping any tiny bubbles that appear.
- Sprinkle any edible decorations or sprinkles onto wet icing immediately because once it sets nothing will stick
- Let decorated cookies dry uncovered for at least 4 hours or overnight for the hardest set
- Layer cookies between sheets of wax paper in an airtight container for storage
 Pin
Pin Whether you are decorating with kids or setting up a serene solo baking session, these cookies have a way of making spring feel more magical. Happy baking and may your kitchen be filled with flour, laughter, and the sweet smell of buttery vanilla.
Recipe Questions & Answers
- → What gives the cookies their tender texture?
-
Chilling the dough before rolling and baking helps the cookies maintain their shape and results in a tender, buttery texture.
- → Can the almond extract be omitted or substituted?
-
Yes, almond extract is optional and can be left out or replaced with a preferred flavor extract without compromising the overall flavor.
- → How should the royal icing be prepared for decorating?
-
Powdered sugar and meringue powder are mixed with water gradually until smooth and pipeable. Food coloring is added to create pastel shades perfect for festive decoration.
- → What is the best way to store decorated cookies?
-
Store decorated cookies in an airtight container at room temperature. They will keep fresh for up to one week.
- → Can citrus zest be added to the dough?
-
Yes, adding lemon or orange zest to the dough enhances the flavor and adds a fresh, aromatic note.
