 Pin
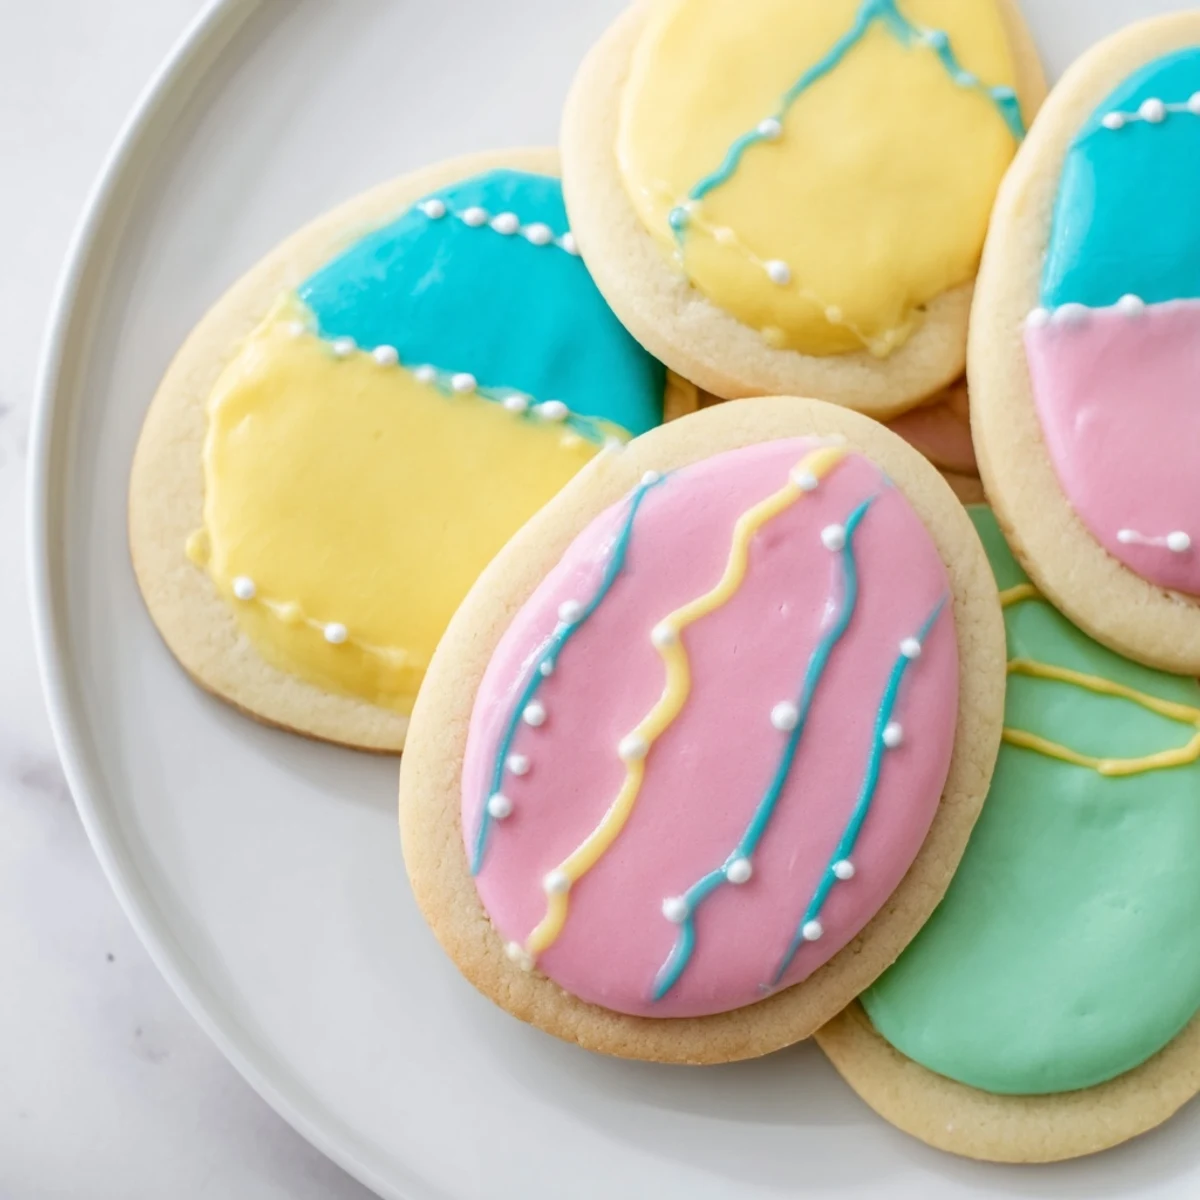
Pin These buttery sugar cookies shaped like Easter eggs bring festive charm to any spring celebration. The dough, enriched with vanilla and softened butter, is chilled before being rolled out and cut into egg shapes. After a quick bake, the cookies are decorated with smooth, colorful royal icing made from powdered sugar and meringue powder. Vibrant hues and optional sprinkles add playful flair, making them ideal for family fun or party treats. They stay fresh for up to a week when stored properly.
The kitchen smelled like vanilla and butter the day my niece discovered she could pipe icing faster than I could finish rolling dough. We had flour on our cheeks and pink food coloring stains on our fingertips, and I realized these cookies were never really about the Easter bunny at all they were about the hours spent leaning over the counter together, creating something messy and bright.
Last spring I made three batches for a neighborhood gathering and watched six-year-olds argue over whether the blue or yellow eggs tasted better. The same recipe that had once intimidated me with its precise measurements became the thing that made me the designated holiday baker a title I never thought I wanted but now wear proudly every April.
Ingredients
- 2 1/2 cups all purpose flour: The backbone of your dough, measured carefully and sifted if you want extra light cookies
- 1/2 tsp baking powder: Just enough lift to give these a tender crumb without making them spread too thin
- 1/4 tsp salt: Balances the sweetness and brings out the vanilla notes
- 3/4 cup unsalted butter: Softened to room temperature so it creams beautifully with the sugar
- 1 cup granulated sugar: Creates that classic sugar cookie sweetness and helps edges crisp slightly while centers stay soft
- 1 large egg: Adds structure and richness
- 2 tsp pure vanilla extract: Do not skip this or use imitation the real stuff makes these taste bakery quality
- 1 tbsp milk: Just enough to bring the dough together without making it sticky
- 2 cups powdered sugar: Sifted first so your icing turns out silky smooth without lumps
- 1 1/2 tbsp meringue powder: The secret to icing that sets hard enough to stack but stays delicious
- 3 tbsp warm water: Start here and add more drop by drop until you reach the right consistency
- Food coloring: Gel colors give you vibrant Easter hues without thinning your icing
Instructions
- Mix the dry ingredients:
- Whisk together the flour, baking powder, and salt in a medium bowl until evenly combined and set aside near your workspace.
- Cream the butter and sugar:
- Beat the softened butter and granulated sugar in a large mixing bowl for 2 to 3 minutes until the mixture looks pale and fluffy.
- Add the egg and vanilla:
- Crack in the egg and pour in the vanilla extract, beating again until everything is fully incorporated.
- Combine the dough:
- Gradually mix in the dry ingredients on low speed, then add the milk and mix until the dough just comes together.
- Chill the dough:
- Divide the dough into two portions, flatten each into a disk, wrap tightly in plastic, and refrigerate for at least one hour.
- Prep for baking:
- Preheat your oven to 350°F and line two baking sheets with parchment paper while the dough chills.
- Roll and cut:
- Roll one dough disk on a lightly floured surface to 1/4 inch thickness, cut out egg shapes, and transfer to the prepared sheets.
- Bake until golden:
- Bake for 8 to 10 minutes until edges just start turning golden, then cool on the sheets for 5 minutes before moving to a wire rack.
- Make the icing:
- Whisk together the powdered sugar, meringue powder, and warm water until smooth and thick but still pipeable.
- Color and decorate:
- Divide the icing into bowls and tint each with food coloring, then pipe onto completely cooled cookies and let set before serving.
 Pin
Pin My daughter asked if we could leave some cookies out for the Easter bunny and I caught myself actually considering where to place the plate. That is when it hit me that these cookies are not just dessert they are the kind of tradition that sneaks up on you and suddenly feels essential.
Getting the Icing Consistency Right
The perfect royal icing for outlining should hold its shape when piped but smooth out within 15 seconds. Flood icing needs to be thinner like honey so it spreads easily to fill the outline without leaving bare spots.
Making Ahead and Storage
You can make the dough up to three days ahead and keep it wrapped in the refrigerator or freeze it for up to a month. Once baked and decorated, store cookies in single layers between wax paper in an airtight container.
Decoration Ideas That Work
Simple polka dots and stripes look elegant and are forgiving for beginners. If you want to add sprinkles or edible glitter, do it immediately after piping while the icing is still wet.
- Pipe a border around the edge first and let it set slightly before filling the center
- Keep a damp paper towel over your icing bowls to prevent them from forming a skin
- Clean your piping bags and tips immediately after use or the icing will harden inside
 Pin
Pin There will be flour on the floor and probably some icing in places it does not belong but the kitchen will smell like sugar and happiness.
Recipe Questions & Answers
- → What makes the sugar cookies soft and buttery?
-
Using softened unsalted butter and careful mixing creates a tender, buttery dough that stays soft after baking.
- → How do I get smooth icing for decorating?
-
Mix powdered sugar with meringue powder and water until thick but pipeable; adjusting water helps achieve a smooth consistency.
- → Can I use gel food coloring for vibrant decorations?
-
Yes, gel food coloring gives bright, vivid colors without thinning the icing too much.
- → Why chill the dough before baking?
-
Chilling firms the dough, making it easier to roll and helping the cookies keep their shape during baking.
- → How should I store these cookies to keep freshness?
-
Store in an airtight container at room temperature; they remain fresh for up to one week.
