 Pin
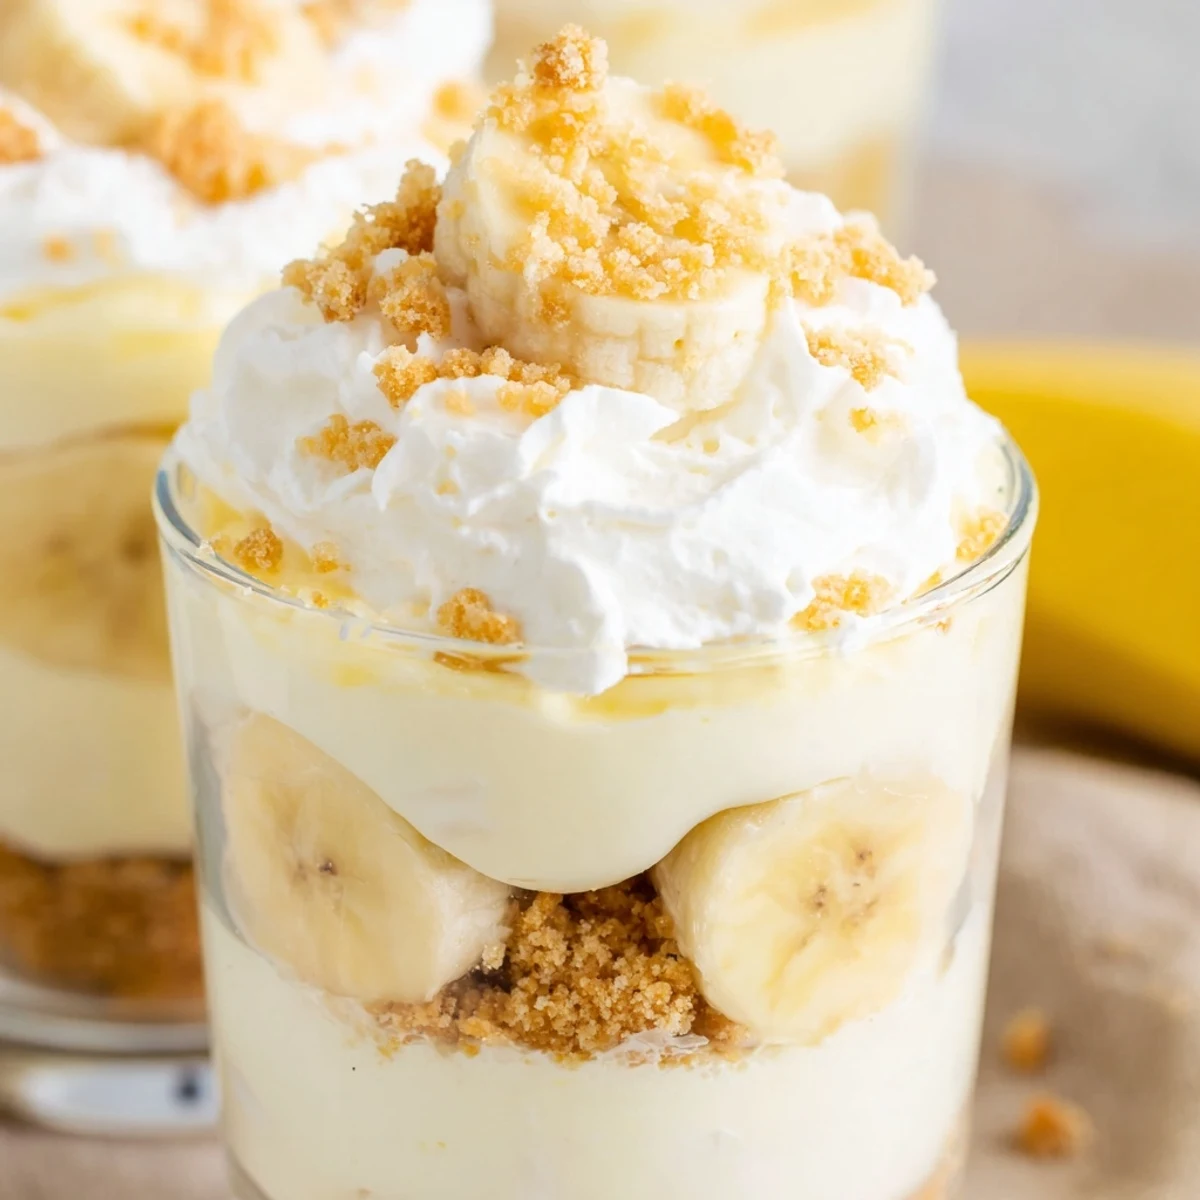
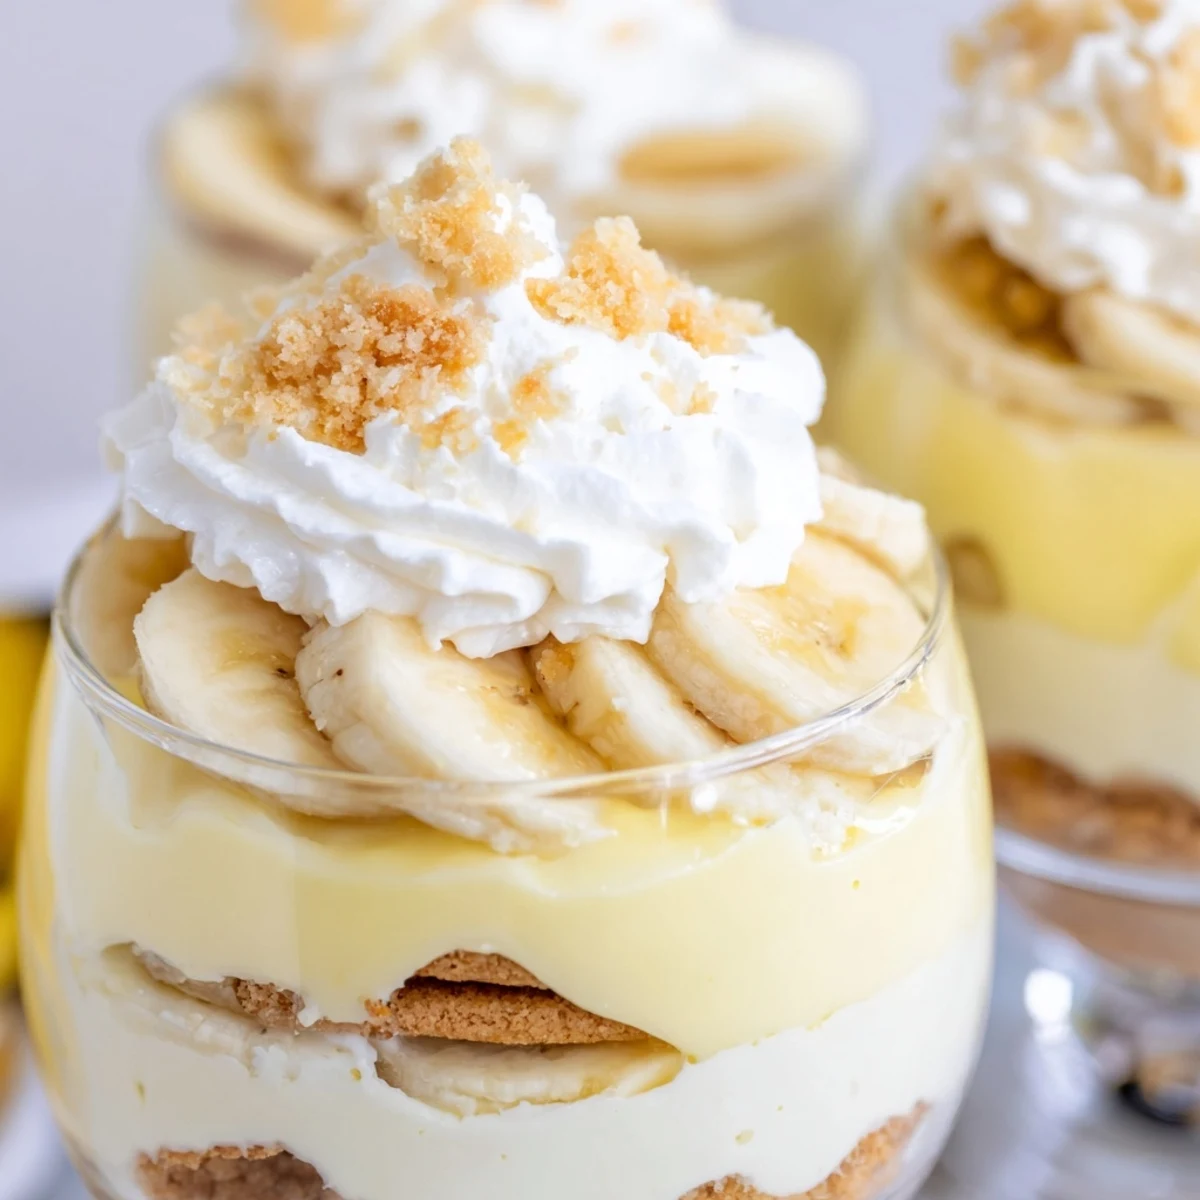
Pin These individual cups feature layers of creamy cheesecake filling and banana pudding nestled on a buttery vanilla wafer crust. The no-bake preparation comes together in just 20 minutes, making it perfect for entertaining or weeknight treats. Each cup is topped with fresh banana slices and extra crunchy crumbs for satisfying texture contrast.
The dessert combines the rich tanginess of cream cheese with sweet banana flavor, all wrapped in crispy cookie crunch. Simply chill for two hours to let the layers set, then serve these elegant portions that look impressive with minimal effort.
Last summer, my youngest begged for a birthday dessert that wouldn't heat up the kitchen. We stood in the dairy aisle together, and she grabbed banana pudding mix with one hand and cream cheese with the other—declaring they'd be perfect together. That afternoon experiment turned into the most requested treat in our house ever since. Something about those individual cups makes everyone feel like they're getting their own special little cake.
I brought these to a friend's backyard barbecue last month, and honestly, I was slightly embarrassed by how simple they were to make. But when her husband took his first bite and literally closed his eyes, I stopped worrying. They disappeared faster than anything else on the dessert table, including the elaborate three layer cake someone else brought.
Ingredients
- 1 cup vanilla wafer cookies, crushed: These classic wafers are essential for that authentic banana pudding flavor—don't substitute with graham crackers or you'll lose the nostalgic taste
- 2 tbsp unsalted butter, melted: Just enough to bind the crumbs together into a cohesive crust that holds its shape when you dig in
- 8 oz cream cheese, softened: Let this sit at room temperature for at least an hour so it blends into the filling without any lumps
- 1/3 cup granulated sugar: This subtle sweetness balances the tanginess of the cream cheese without overpowering the banana flavor
- 1 tsp pure vanilla extract: Real vanilla makes a noticeable difference here—imitation just doesn't have the same depth
- 1 cup heavy whipping cream, cold: The colder your cream, the faster it whips and the more stable your filling becomes
- 1 package instant banana pudding mix: This shortcut ingredient is what keeps the recipe accessible while still delivering that unmistakable banana flavor
- 1 1/4 cups cold whole milk: Whole milk creates the richest, most luxurious pudding layer
- 2 ripe bananas, sliced: Look for bananas with some brown spots—they're sweeter and have a more intense banana flavor
Instructions
- Build the crust foundation:
- In a small bowl, combine crushed vanilla wafers and melted butter. Mix until evenly moistened. Spoon about 2 tablespoons into the bottom of each serving cup and press lightly to form the crust.
- Whip up the cheesecake base:
- In a medium bowl, beat cream cheese, sugar, and vanilla extract with a hand mixer until smooth and creamy. In a separate bowl, whip the cold heavy cream until stiff peaks form. Gently fold the whipped cream into the cream cheese mixture until fully combined.
- Prepare the pudding layer:
- In another bowl, whisk together the banana pudding mix and cold milk for 2 minutes until thickened.
- Assemble the layered cups:
- Layer cheesecake filling over the crust in each cup, using about half the mixture. Add a layer of sliced bananas over the cheesecake filling. Spoon banana pudding over the banana layer, dividing evenly among cups. Top with remaining cheesecake mixture.
- Add the finishing touches:
- Sprinkle each cup with additional wafer crumbs, more banana slices, and a dollop of whipped cream if desired. Cover and refrigerate the cups for at least 2 hours before serving.
 Pin
Pin My daughter now requests these for every celebration, and I've learned to double the recipe because somehow the first batch always disappears during taste testing. Last weekend she helped me assemble them and proudly declared them better than any restaurant dessert. That's the thing about simple recipes done right—they create the kind of memories that stick around longer than the actual dessert.
Making Ahead
You can absolutely prepare these up to 24 hours in advance, which is why they've become my go to for dinner parties and potlucks. The flavors actually develop and intensify overnight in the refrigerator. Just wait to add the fresh banana slices and final crumb topping until right before serving.
Serving Suggestions
Clear glass cups or mason jars show off the beautiful layers and make these desserts feel extra special. I keep a set of six small parfait glasses specifically for this recipe. A small pastry bag fitted with a star tip makes adding the whipped cream topping look professional with minimal effort.
Customization Ideas
While the classic version is hard to beat, there are some fun variations that work beautifully. A pinch of cinnamon in the crust adds warmth and depth. Sometimes I'll drizzle a little caramel sauce between the layers for extra richness. For a tropical twist, try adding toasted coconut flakes on top instead of extra wafer crumbs.
- Chocolate lovers can add a tablespoon of cocoa powder to the cheesecake filling
- A splash of rum or banana liqueur in the pudding layer makes these more adult friendly
- Crushed pineapple works surprisingly well as an alternative to banana slices
 Pin
Pin These little cups have become my secret weapon for bringing something special to gatherings without spending hours in the kitchen. Sometimes the simplest recipes, made with love and attention to detail, end up being the ones people remember most.
Recipe Questions & Answers
- → How long do the cups need to chill before serving?
-
The cups require at least 2 hours of refrigeration time to allow the layers to set properly. This chilling period ensures the cheesecake filling achieves the right texture and the banana pudding thickens completely.
- → Can I make these ahead of time?
-
Yes, you can prepare these cups up to 24 hours in advance. For best results, add the fresh banana slices and wafer crumb toppings just before serving to prevent the bananas from browning and maintain the crunch.
- → How do I prevent the banana slices from turning brown?
-
Toss the sliced bananas lightly in lemon juice before adding them to the cups. The citric acid helps prevent oxidation and keeps the bananas looking fresh. Alternatively, serve immediately after topping with banana slices.
- → Can I use homemade pudding instead of instant mix?
-
Yes, homemade vanilla pudding can replace the instant banana pudding mix. Use about 1 1/2 cups of prepared homemade vanilla pudding and add mashed ripe banana or banana extract to achieve the desired banana flavor.
- → What type of cups work best for this dessert?
-
Clear glass cups, mason jars, or dessert glasses work beautifully as they showcase the layered presentation. Each cup should hold about 6-8 ounces to accommodate all the layers. Any small individual serving vessel will work well.
- → Can I substitute the vanilla wafers with another cookie?
-
Graham cracker crumbs, gingersnaps, or digestive biscuits make excellent alternatives to vanilla wafers. Simply crush them finely and mix with melted butter the same way. Each option will bring a slightly different flavor profile to the crust.
