 Pin
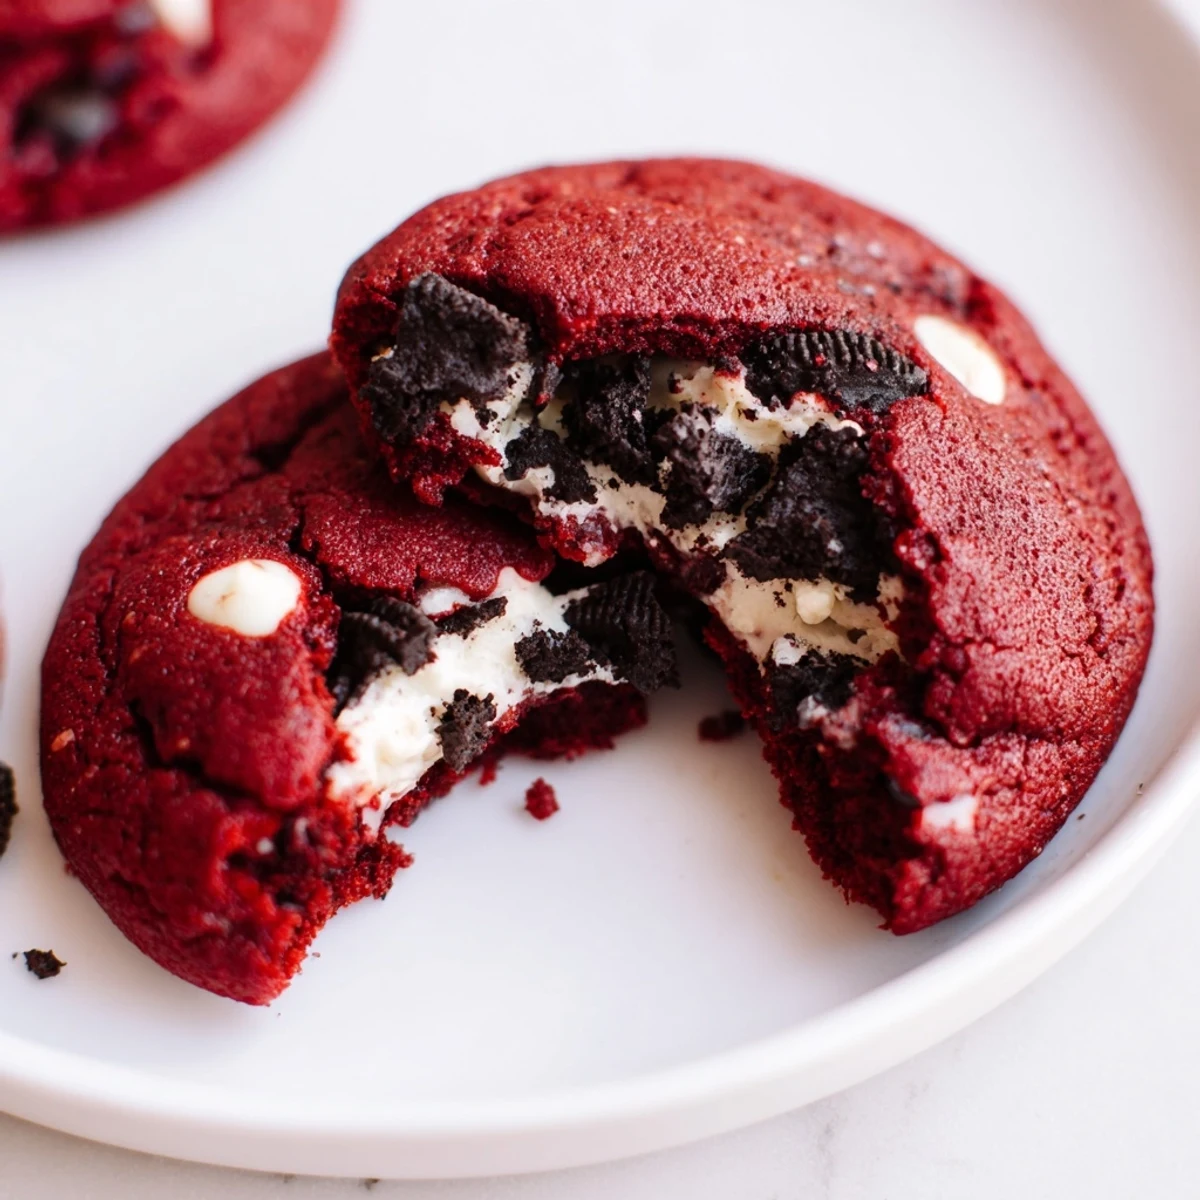
Pin These stuffed red velvet cookies feature a rich, chewy dough infused with cocoa and vibrant red coloring, loaded with white chocolate chips for added sweetness. The surprise element comes from the creamy Oreo-filled center—cream cheese buttercream blended with crushed Oreos creates an irresistible filling that bakes into a gooey, indulgent core. Perfect for holidays, parties, or whenever you crave an over-the-top dessert experience.
The bright red dough against my hands still makes me smile every time I make these cookies. I accidentally bought white chocolate chips instead of semi-sweet during a chaotic grocery run, and that happy mistake transformed what would have been ordinary red velvet cookies into something entirely different and delightful.
My sister's face when she bit into the first one and discovered the hidden Oreo center was absolutely priceless. She kept turning it over in her hands like she was trying to solve a magic trick, and now she requests these for every family gathering without fail.
Ingredients
- 2 cups all-purpose flour: The foundation that holds everything together, don't skip measuring this accurately or you'll end up with flat cookies
- 1/4 cup unsweetened cocoa powder: Sift this first to avoid any stubborn lumps in your beautiful red dough
- 1 tsp baking soda: This gives your cookies that perfect lift so they're not dense little hockey pucks
- 1/2 tsp salt: Just enough to make all the sweet flavors pop without being salty
- 1/2 cup unsalted butter softened: Room temperature is non-negotiable here, cold butter won't cream properly with your sugars
- 3/4 cup granulated sugar: Creates that crisp edge we all love on a perfectly baked cookie
- 1/2 cup packed light brown sugar: Adds moisture and that deep caramel note you can't quite put your finger on
- 1 large egg: Bind everything together while contributing to the chewy texture
- 1 tbsp milk: Just enough liquid to bring your dough together without making it sticky
- 2 tsp vanilla extract: Don't use imitation here, the real stuff matters in a recipe this simple
- 1 tbsp red food coloring: Gel coloring gives you that vibrant red without adding extra liquid to your dough
- 1 cup white chocolate chips: The surprise MVP ingredient that makes these unforgettable
- 4 oz cream cheese softened: Make sure this is truly soft or your filling will have lumps
- 2 tbsp unsalted butter softened: Works with the cream cheese to create that velvety smooth filling
- 1 1/4 cups powdered sugar sifted: Sifting is annoying but necessary for smooth Oreo cream
- 1/2 tsp vanilla extract: A little vanilla in the filling makes it taste professionally made
- 8 Oreo cookies finely crushed: Crush these to your desired texture, some like big chunks, others want it almost like dust
Instructions
- Preheat your kitchen:
- Get your oven to 350°F and line two baking sheets with parchment paper before you even start mixing
- Whisk the dry team:
- Combine flour, cocoa powder, baking soda and salt in a medium bowl, whisking until you can't see any cocoa streaks anymore
- Cream your butter and sugars:
- Beat butter, granulated sugar and brown sugar until the mixture turns pale and fluffy, this usually takes about 3 minutes of serious mixing
- Add the wet ingredients:
- Pour in your egg, milk, vanilla and red food coloring, mixing until everything is fully incorporated and you have that shocking red color
- Combine everything:
- Gradually add those dry ingredients to your red mixture, mixing just until you don't see flour anymore, then fold in those white chocolate chips last
- Make the Oreo magic filling:
- Beat cream cheese and butter until completely smooth, add powdered sugar and vanilla, then fold in your crushed Oreos and chill this for 10 minutes because warm filling is a nightmare to work with
- Stuff those cookies:
- Scoop about 2 tablespoons of dough, flatten it in your palm, add a teaspoon of that chilled Oreo cream, then fold the edges up and over until the filling is completely hidden inside
- Space them out:
- Place your stuffed dough balls on the prepared sheets with at least 2 inches between them because these will spread
- Bake to perfection:
- Slide them into the oven for 11 to 12 minutes, pulling them out when the edges look set but the centers still seem slightly soft
- Patience pays off:
- Let them cool on the baking sheet for 5 minutes before moving them to a wire rack, otherwise they'll fall apart when you try to lift them
 Pin
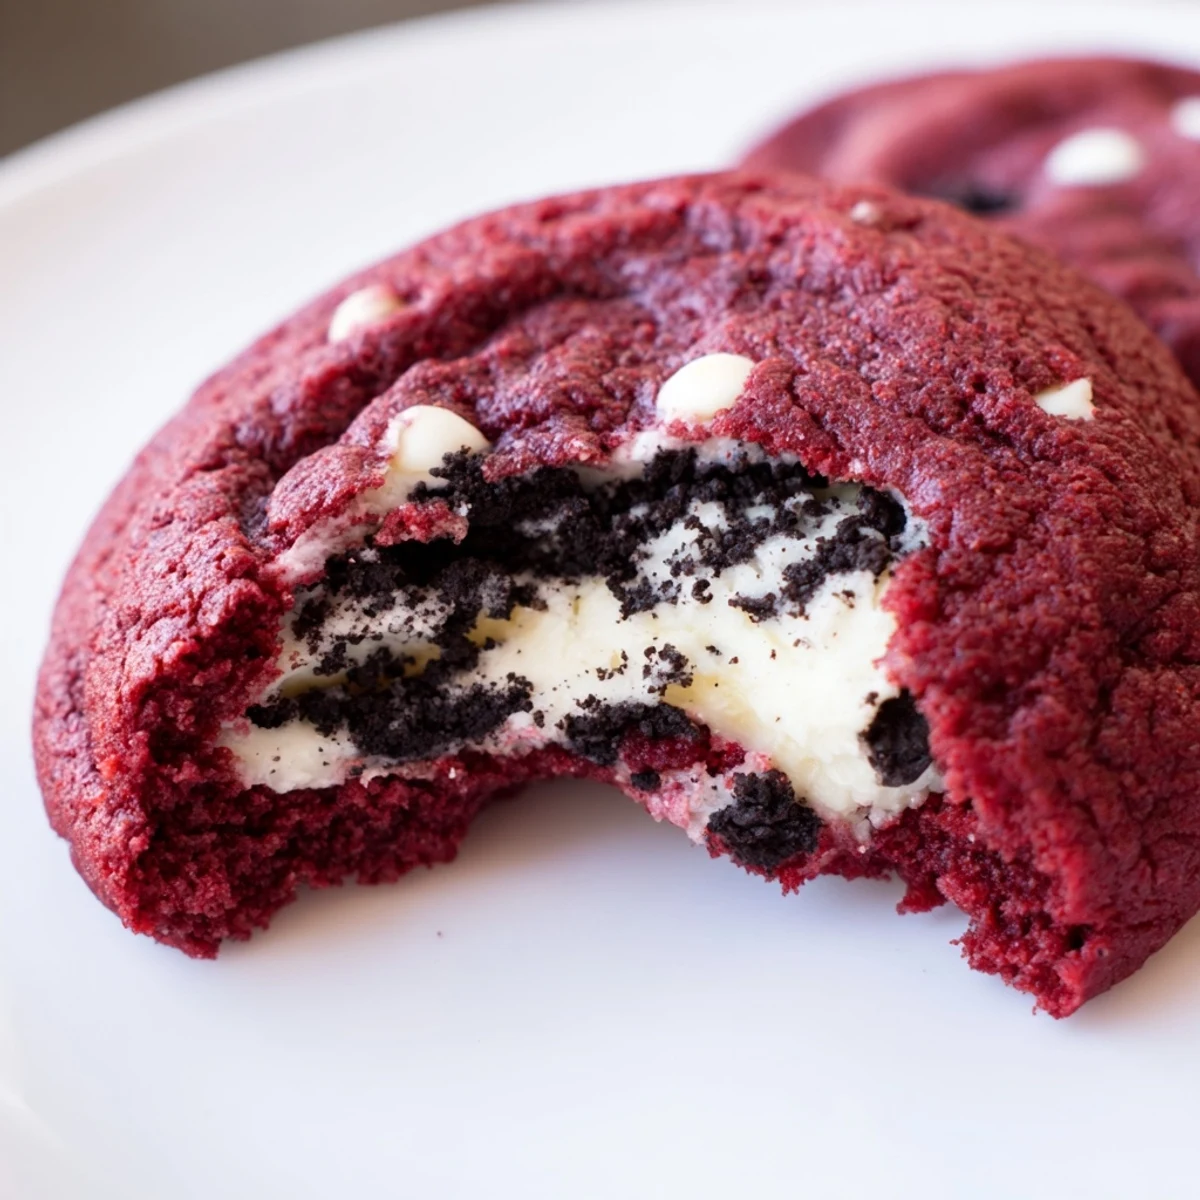
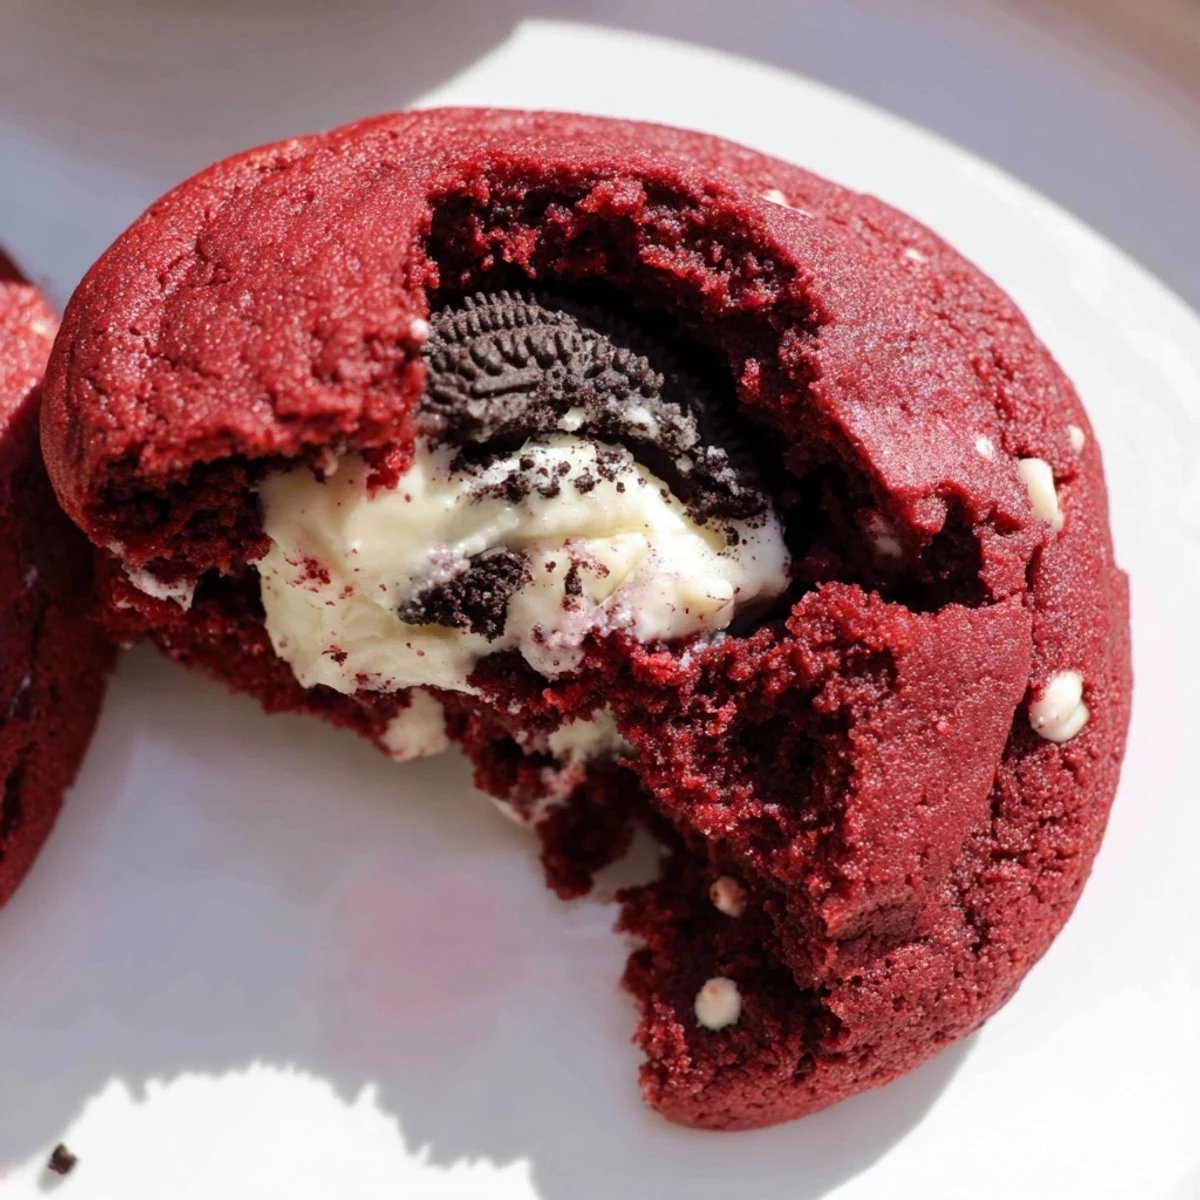
Pin These cookies have become my go-to for when I need to bring something impressive to a party but don't want to spend all day in the kitchen. The best part is watching people's expressions when they take that first bite and discover what's hidden inside.
Making Assembly Less Messy
I've learned that keeping a small bowl of flour nearby while stuffing the cookies is a game changer. Lightly dusting your hands prevents the red dough from sticking to everything, and having damp paper towels ready helps clean up the inevitable food coloring mishaps.
Storage Secrets
These cookies actually taste better on day two, believe it or not. The filling softens slightly and melds with the cookie, creating this incredible fudge-like texture that makes them absolutely irresistible. Store them in an airtight container with parchment paper between layers.
Customization Ideas
Sometimes I swap the white chocolate chips for dark chocolate when I want something less sweet. You can also roll the stuffed dough balls in extra crushed Oreos before baking for an obvious Oreo presentation that looks impressive and adds even more cookie crunch.
- Try adding a teaspoon of espresso powder to the dough for a mocha red velvet variation
- Mint extract in the filling instead of vanilla creates a thin mint inspired version
- Mini chocolate chips work better than regular size for more even distribution in the red dough
 Pin
Pin There's something deeply satisfying about hiding that surprise center inside each cookie. Every batch I make feels like a little gift I'm wrapping up for someone special to unwrap with their first bite.
Recipe Questions & Answers
- → Can I make these cookies ahead of time?
-
Yes, you can prepare the dough and filling separately up to 2 days in advance. Store both in the refrigerator, then assemble and bake when ready. The filling needs to be chilled before stuffing, so this actually works perfectly for make-ahead preparation.
- → How do I prevent the filling from leaking during baking?
-
The key is ensuring the Oreo filling is properly chilled before stuffing—refrigerate it for at least 10 minutes. When wrapping the dough around the filling, seal the edges completely by pinching the dough together. If any gaps remain, the filling may seep out while baking.
- → Can I freeze these cookies?
-
You can freeze unbaked stuffed dough balls for up to 3 months. Place them on a baking sheet until firm, then transfer to a freezer bag. Bake from frozen, adding 1-2 minutes to the baking time. Already baked cookies can be frozen for up to 2 months in an airtight container.
- → What can I use instead of red food coloring?
-
For a natural alternative, use beet juice or puree, though the color will be more muted. Alternatively, skip the coloring entirely—they'll still taste delicious as chocolate velvet cookies. Gel food coloring provides more vibrant results than liquid with less moisture added to the dough.
- → Why did my cookies spread too much?
-
Excess spreading usually happens if the dough or filling is too warm. Chill the assembled dough balls for 15-20 minutes before baking if your kitchen is warm. Also measure flour correctly—too little flour causes cookies to spread. Using room-temperature ingredients (not melted) helps maintain structure.
- → Can I use different mix-ins?
-
Absolutely! Semi-sweet or dark chocolate chips work well instead of white chocolate. You could also add chopped pecans or walnuts for texture. For the filling, try crushing different sandwich cookies or adding a tablespoon of peanut butter to the cream cheese mixture.
