 Pin
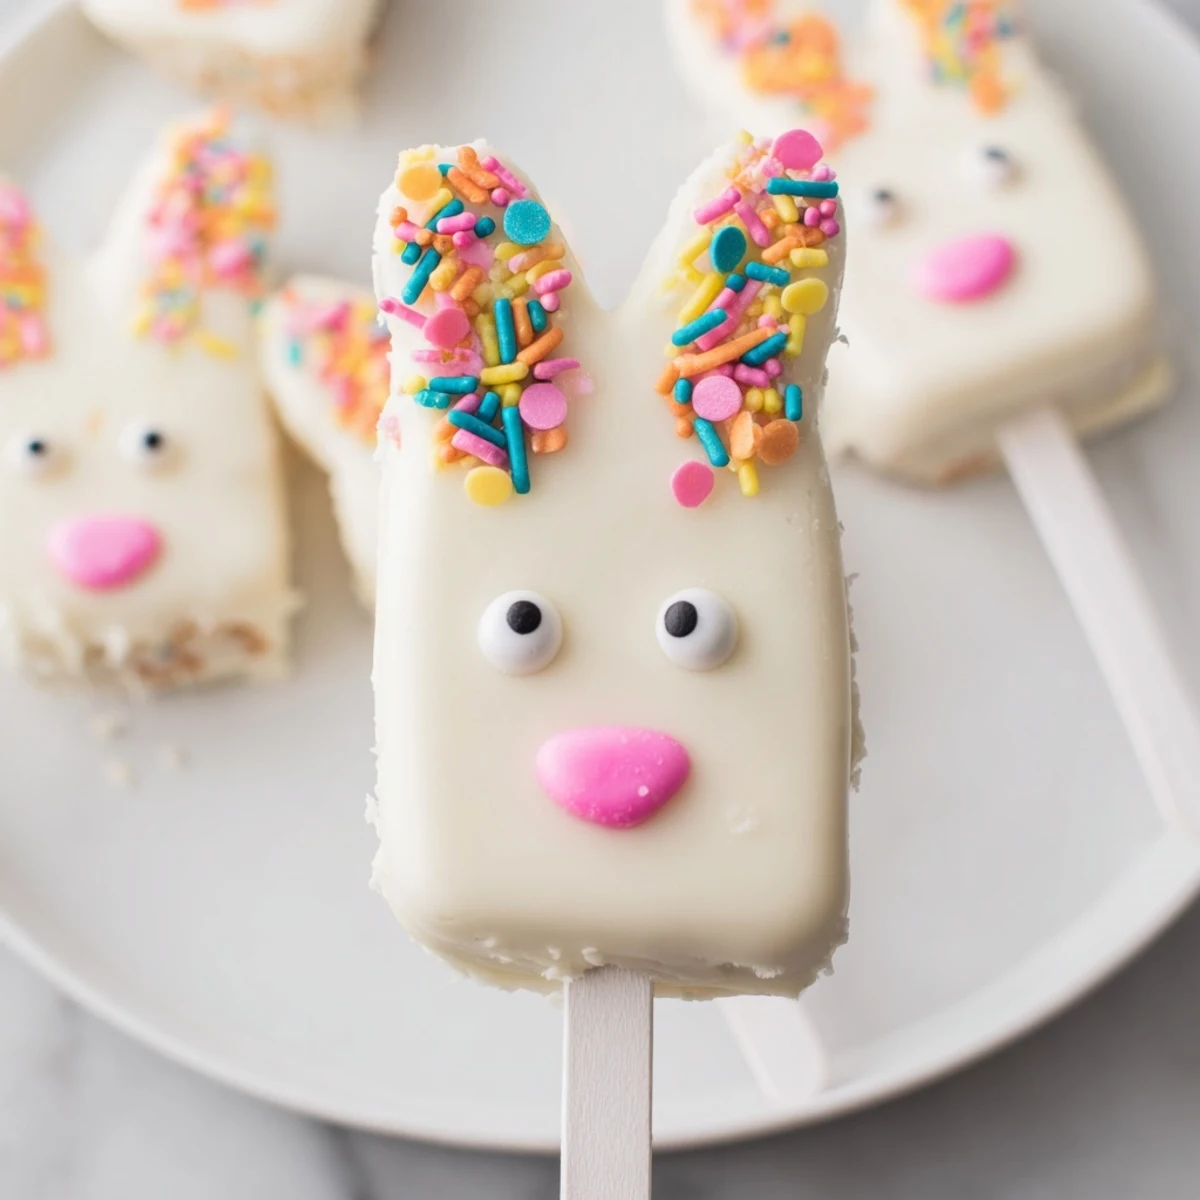
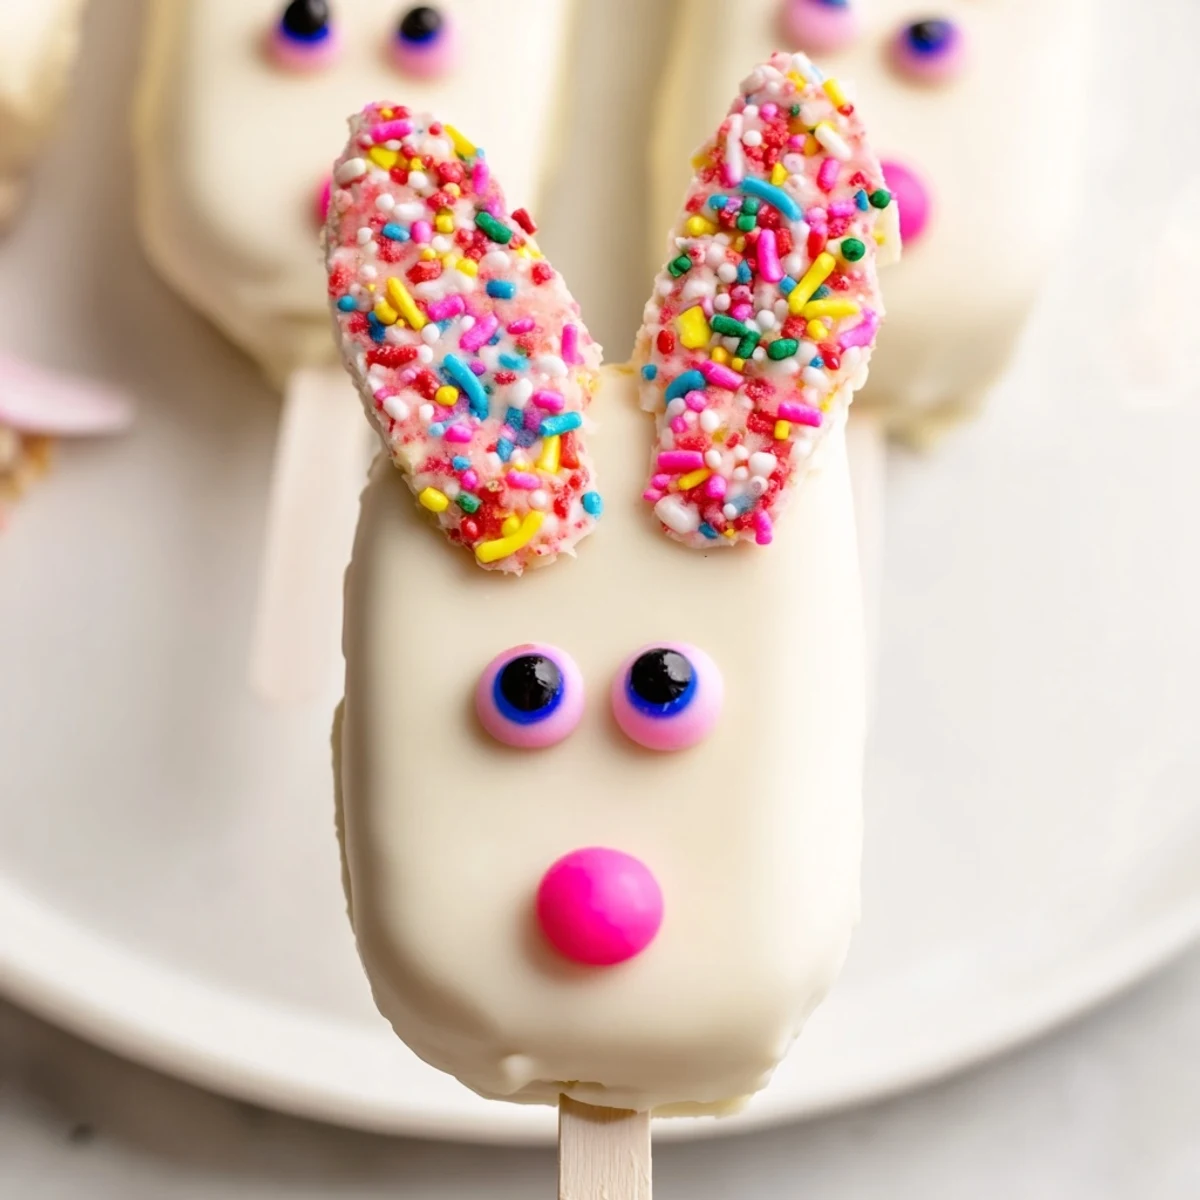
Pin These delightful bunny-shaped treats combine moist vanilla cake crumbs with cream cheese and butter, formed into charming bunny faces and coated in smooth white chocolate. Perfect for Easter festivities, these handheld desserts offer fun decoration opportunities with candy eyes, sprinkles, and colorful fondant ears. The preparation comes together in just one hour, yielding eight adorable cakesicles that bring whimsical charm to any spring celebration.
The kitchen counter was covered in white chocolate splatters and my daughter was practically vibrating with excitement. We'd seen these adorable bunny cakesicles on social media and decided last minute that Easter simply wasn't complete without them. Three failed attempts later, we finally figured out the secret to getting that smooth, professional looking coating without the cake falling off the sticks.
Last year I made these for my niece's Easter egg hunt and the kids were so mesmerized that they forgot about the actual eggs for a solid ten minutes. My sister admitted later that she ate two in the car on the way home because she couldn't resist sneaking them when the kids weren't looking. Now they're officially requested for every family gathering.
Ingredients
- Vanilla cake crumbs: Use leftover cake or cupcakes, homemade or store-bought, any flavor you love works beautifully
- Cream cheese: Must be softened to room temperature or your mixture will be lumpy and frustrating to work with
- Unsalted butter: Also softened, this helps bind everything together into that perfect dough-like consistency
- Powdered sugar: Just enough to sweeten the cake mixture without making it cloyingly sweet
- Vanilla extract: Pure vanilla makes such a difference here, don't skip it
- White chocolate: High-quality melts or chopped white chocolate bars work best for smooth dipping
- Edible gel food coloring: Pink for ears and noses, yellow for cute accents, whatever makes your bunnies come alive
- Cakesicle sticks: Paper lollipop sticks work perfectly, just make sure they're food-safe
- Sprinkles and decorations: Candy eyes, fondant ears, whatever sparkly things catch your eye
Instructions
- Make the cake mixture:
- Combine all the cake ingredients in a medium bowl, mixing until everything comes together into a dough that holds its shape when you squeeze it.
- Shape your bunnies:
- Divide the mixture into eight equal portions and form each into a slightly flattened oval, pressing gently to create a bunny face shape.
- Add the sticks:
- Insert a cakesicle stick into each shaped portion, pressing about halfway in and making sure it feels secure.
- Chill thoroughly:
- Refrigerate for at least 20 to 30 minutes because if the cake mixture isn't cold, it will slide right off into your melted chocolate.
- Melt the chocolate:
- Heat your white chocolate in 30-second bursts, stirring between each interval until perfectly smooth and glossy.
- Dip carefully:
- Dip each chilled cake pop into the melted chocolate, tilting to coat completely, then gently tap against the bowl edge to remove excess.
- Decorate immediately:
- While the coating is still soft, add candy eyes, sprinkle noses, or press fondant ears into place before the chocolate sets.
- Set and serve:
- Let the cakesicles harden at room temperature or pop them in the fridge for a few minutes to speed things up.
 Pin
Pin My favorite moment was when my usually picky eater nephew asked if we could make these every holiday, not just Easter. He suggested ghosts for Halloween, trees for Christmas, hearts for Valentine's Day. Sometimes it's the silly, festive treats that create the most lasting memories around the table.
Getting That Smooth Coating
The trick to professional looking cakesicles is temperature management. Your cake pops need to be cold and your chocolate needs to be warm but not hot. I've found that around 90°F is the sweet spot where the chocolate flows beautifully but doesn't melt the cake underneath.
Decoration Ideas That Wow
Don't limit yourself to just white chocolate bunnies. Try swirling pink food coloring through the white chocolate before dipping for a marbled effect that looks absolutely stunning. Or use dark chocolate coating and make little vampire bunnies for a fun twist on the traditional Easter theme.
Storage And Make Ahead Tips
These actually keep beautifully in the refrigerator for up to three days, which makes them perfect for preparing a day before your celebration. I've learned to wrap them individually in parchment paper once set so they don't stick together in the container.
- Set up a decorating station with small bowls of different toppings before you start dipping
- Have a piece of styrofoam ready to stick the cakesicles in while they dry
- Double check that your sticks are food grade and not just craft supplies
 Pin
Pin These bunny cakesicles have become such a beloved spring tradition in our house. There's something magical about seeing them lined up on the counter, each one with its own personality, ready to make someone's holiday a little sweeter.
Recipe Questions & Answers
- → How far in advance can I make these bunny cakesicles?
-
These treats can be prepared up to 3 days in advance when stored properly in an airtight container in the refrigerator. The coating stays fresh, and decorations remain intact when kept chilled until serving time.
- → Can I use different cake flavors besides vanilla?
-
Absolutely! Chocolate, lemon, red velvet, or funfetti cake crumbs work beautifully. The white chocolate coating complements most flavors, allowing you to customize according to preference or what you have available.
- → What's the best way to melt the white chocolate for coating?
-
Melt in 30-second intervals in a microwave-safe bowl, stirring thoroughly between each burst. This prevents seizing and ensures smooth, pourable chocolate. Alternatively, use a double boiler on low heat for gentle melting.
- → Do I need a special mold to shape these into bunnies?
-
While cakesicle molds create uniform shapes, you can hand-form the dough into flattened ovals and use fondant or candy for bunny features. The freeform method adds rustic charm and makes each treat unique.
- → How can I customize the decorations for different occasions?
-
Switch up colors and themes—pastel sprinkles for baby showers, orange and black for Halloween, or red and green for winter holidays. The base shape works year-round with seasonal decoration variations.
- → What's the trick to getting the chocolate coating smooth?
-
Ensure the cake pops are thoroughly chilled before dipping. Tap gently against the bowl edge after dipping to remove excess chocolate, then place on parchment paper immediately. Avoid over-handling while the coating sets.
